Druckdaten: 25% Infill, 0.2 mm Height of Layer, 93% Flow, 232° Nozzle, 80° Heatbed 1st Layer, 75° Rest of the Thing...

»Sie haben es getan und sie werden es jederzeit wieder tun, wenn es ihnen gestattet wird.« Hans Frick
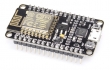
sudo esptool.py --port /dev/ttyUSB0 erase_flash

sudo esptool.py --port /dev/ttyUSB0 write_flash -fs 1MB -fm dout 0x0000 nodemcu_integer_0.9.6-dev_20150704.bin
#define DEFAULT_AXIS_STEPS_PER_UNIT { 80.80, 80.40, 396.432, 453.02}
#define INVERT_E0_DIR true
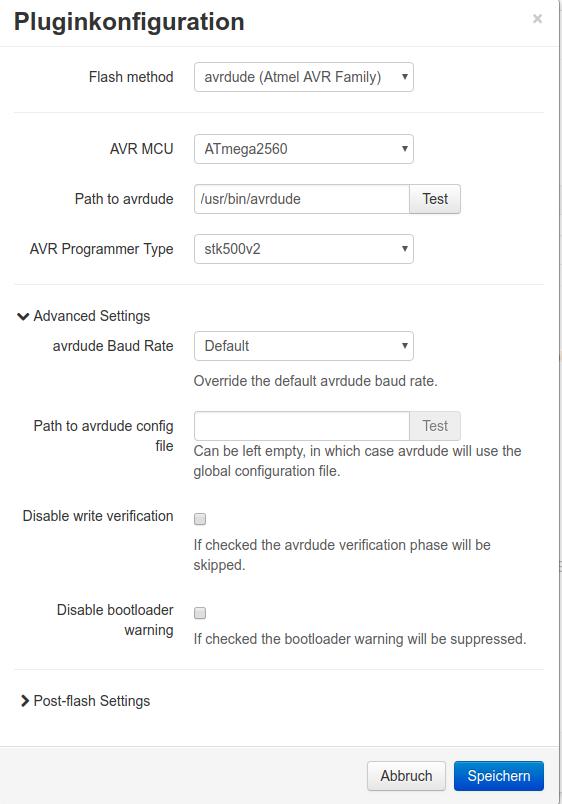 Neue Firmware lässt sich natürlich direkt aus der Arduino IDE auf den Drucker flashen. Was aber, wenn der USB Port des Druckers bereits durch eine Verbindung zum OctoPrint Druckserver belegt ist? Sinn des Druckservers ist es ja vor allem, unabhängig vom jeweiligen Arbeitsplatzrechner aus den 3D Druck anstoßen zu können, also fallen Sachen wie Drucker zum Rechner tragen oder Notebook an Drucker stöpseln, danach wieder den RaspBerry PI ranhängen Turnschuh-EDV aus. Denn für solcherlei Dinge gibt es das auf der Vorarbeit von Nicanor Romero Venier basierende Firmwareupgrade Plugin von Gina Häußge und Ben Lye. Da es sich quasi um ein Frontend für den avrdude Befehl handelt, muss selbiger ebenfalls installiert sein. Das Plugin nimmt einem dann die ganze Arbeit ab, man muss lediglich wissen, wo die kompilierte *.hex Datei aus der Arduino IDE liegt, anstatt sich
avrdude -p m2560 -c stk500 -P /dev/ttyUSB0 -U flash:w:MarlinV1.1.5.ino.hex:i -v
merken zu müssen (wobei das letztlich wesentlich schneller funktioniert).
Für den AnyCubic i3 MEGA werden darüber hinaus die folgenden Parameter benötigt, damit das Flashen problemlos verläuft:
Flash Method: avrdude (Atmel AVR Family)
AVR MCU: ATmega2560
AVR Programmer Type: stk500v2
Besonders interessant ist die Möglichkeit, Firmwares direkt aus dem Netz installieren zu können, allein die Eingabe der entsprechenden URL reicht aus. Oder eben der entsprechende Dateiname / Speicherort im lokalen Netz / Rechner.
HINWEIS:
Alle gemachten Angaben sind ohne Gewähr auf Funktion und Richtigkeit. Für eventuell entstehende Schäden übernehmen wir keinerlei Haftung. Sämtliche Veränderungen geschehen auf Eure Verantwortung und Gefahr.
Irgendwie muss ich das alles finanzieren, daher sind die allermeisten Links Affiliate. D.h.: Solltet Ihr über diese Links zu einem Onlinehändler geraten und dort etwas bestellen, bekomme ich eine kleine Provision, für Euch ändert das am Preis natürlich nichts. Für die Inspirationen geht ein herzliches Dankeschön an die genannten Personen, insbesondere an die OctoPrint Community!
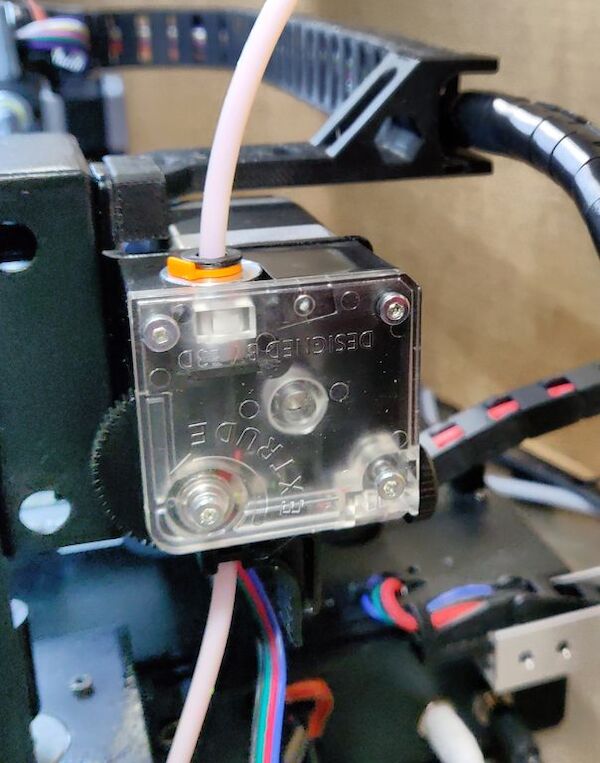
#define DEFAULT_AXIS_STEPS_PER_UNIT { 80, 80, 400, 453.02 }So können auch die Slicer Einstellungen unangetastet bleiben, sollte es Probleme mit dem Ausdruck geben, die sich nicht mit den üblichen Tipps beseitigen lassen, sollte man zuerst an den Steps regulieren.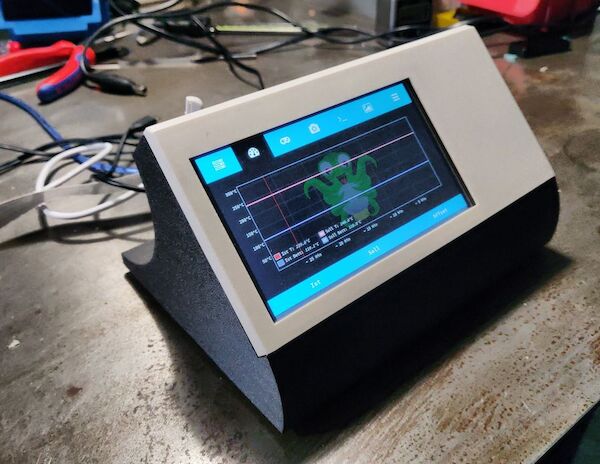
ssh pi@octopi.lan
sudo nano /boot/config.txt
display_rotate=0
sudo reboot -n
sudo apt install xserver-xorg-input-evdev
sudo cp -rf /usr/share/X11/xorg.conf.d/10-evdev.conf /usr/share/X11/xorg.conf.d/45-evdev.conf
sudo reboot
sudo dpkg -i -B xinput-calibrator
/ect/X11/xorg.conf.d/99-calibration.conf
Section "InputClass"
        Identifier      "calibration"
        MatchProduct    "ADS7846 Touchscreen"
        Option  "Calibration"   "3905 208 3910 288"
        Option  "SwapAxes"      "0"
EndSectionsudo apt install chromium-browser -y
git clone https://github.com/BillyBlaze/OctoPrint-TouchUI-autostart.git ~/TouchUI-autostart/
sudo ~/TouchUI-autostart/helpers/install
Noch ein kleiner Merkzettel für mich und wer es sonst noch brauchen kann, wie man jeden 3D Drucker den AnyCube i3 MEGA ein bisschen tieferlegt genauer einstellt.
curl -k -H "X-Api-Key: AAAAAAAAAAAAAAAAAAAAAAAAAAAAAAAA" -F "select=false" -F "print=false" -F "file=@[output_filepath]" "http://IPADDRESS:PORT/api/files/local" {STRIP "; postProcessing"} kann direkt aus Simplify3D auf den OctoPrint Server gedruckt werden. Dabei sind natürlich der API Key statt den "AAAAAAAAAAAAAAAAAAAAAAAAAAAAAAAA" einzufügen, ebenso die URL, unter der OctoPrint erreichbar ist. Wenn man bei "select" und / oder "print" statt "false" den Wert "true" angibt, druckt Octoprint automatisch los. Nicht ändern sollte man die Variable hinter "file" 8-)Zu meinem YouTube Kanal, mit aktuellen Drucken.

Send: M851 ; Z Probe Offset anzeigen lassen Recv: echo:Probe Z Offset: -2.02 Recv: ok [...] Send: M851 Z0 ; Z Probe Offset auf Null setzen Recv: ok [...] Send: G28 ; Nullpunkt anfahren [...] Recv: echo:busy: processing Recv: X:-5.00 Y:0.00 Z:0.00 E:0.00 Count X:-400 Y:0 Z:0 Recv: ok [...] Send: G1 Z1 X110 Y110 F2000 ; In die Mitte des Druckbettes fahren Recv: ok [...] Send: G92 Z0 ; Recv: X:110.00 Y:110.00 Z:0.00 E:0.00 Count X:8800 Y:8800 Z:0 Recv: ok [...] Send: G30 X110 Y110 [...] Recv: Bed X: 110.00 Y: 110.00 Z: 2.08 Recv: X:77.00 Y:105.00 Z:10.00 E:0.00 Count X:6160 Y:8400 Z:4000 Recv: ok [...] Recv: ok [...] Send: G1Z-0.1 ; Bis 0.05mm / ein Kassenbon zwischen Düsenspitze und Bett passt. BTW: Ich empfehle als Metaller natürlich, eine Fühlerlehre, kann man auch für andere Sachen verwenden. Recv: ok [...] Send: G1Z-0.1 ; Bis 0.05mm / ein Kassenbon zwischen Düsenspitze und Bett passt. Recv: ok [...] Send: G1Z-0.1 ; Bis 0.05mm / ein Kassenbon zwischen Düsenspitze und Bett passt. [...] Send: G92 Z0 ; Neuer Nullpunkt an diese Stelle setzen Recv: X:110.00 Y:110.00 Z:0.00 E:0.00 Count X:8800 Y:8800 Z:0 Recv: ok [...] Send: G30 X110 Y110 ; Offset ausgeben. Wert bei der 1. Z-Anzeige (hier in GRÜN angezeigt) merken [...] Recv: echo:busy: processing Recv: Bed X: 110.00 Y: 110.00 Z: 2.08 ; Diesen Z-Wert merken! Recv: X:77.00 Y:105.00 Z:10.00 E:0.00 Count X:6160 Y:8400 Z:4000 Recv: ok [...] Send: M851 Z-2.08 ; Neues Offset eingeben mit dem eben gemerkten Z-WeÅ•t Recv: ok [...] Send: M500 ; Den Wert ins EEPROM speichern Recv: echo:Settings Stored (731 bytes; crc 34074) Recv: ok
Recv: Bilinear Leveling Grid:
Recv: 0 1 2 3 4
Recv: 0 +0.010 -0.020 -0.033 -0.020 +0.027
Recv: 1 +0.058 +0.023 +0.015 +0.040 +0.090
Recv: 2 +0.082 +0.040 +0.027 +0.058 +0.108
Recv: 3 +0.082 +0.053 +0.027 +0.065 +0.095
Recv: 4 +0.058 +0.010 -0.020 +0.003 +0.045
Recv:
Recv: X:164.00 Y:193.00 Z:12.06 E:0.00 Count X:13120 Y:15440 Z:4832
Send: M140 S0
Recv: ok
Send: M500
Recv: echo:Settings Stored (731 bytes; crc 9049)
Recv: okRecv: Bilinear Leveling Grid: Recv: 0 1 2 3 4 Recv: 0 +0.020 -0.017 -0.030 -0.025 +0.038 Recv: 1 +0.063 +0.038 +0.007 +0.055 +0.092 Recv: 2 +0.098 +0.043 +0.043 +0.063 +0.118 Recv: 3 +0.092 +0.055 +0.030 +0.075 +0.098 Recv: 4 +0.063 +0.013 -0.017 +0.013 +0.043 Recv: Recv: X:164.00 Y:193.00 Z:12.06 E:0.00 Count X:13120 Y:15440 Z:4832 Send: M140 S0 Recv: ok [...] Send: M500 Recv: echo:Settings Stored (731 bytes; crc 34326) Recv: ok [...]
G21 ; Wir verwenden Millimeter
G90 ; Absolute Positionierung...
M82 ; ... auch für den Steppermotor am Extruder
M107 ; Lüfter aus
G28 X0 Y0 ; Referenzpunkte XY anfahren
G28 Z0 ; Referenzfahrt auch für Z
G1 Z15.0 F{travelspeed} Z Achse 15 mm anheben
G92 E0 ; Extruder auf 0 setzen
G1 F200 E3 ; Extruder soll eine 3mm lange Wurst auspressen
G1 E0 ; und stoppen...
G1 F{travelspeed} ;
G28; Nullpunkte / Home anfahren
G29; Auto Bed Levelling (ABL) anwerfen
M500; Werte in Firmware / EEPROM speichern
M420 S1; BLTouch aktivieren
# Anpassung der Pin Mappings für den AnyCubic i3 MEGA, TMC2208 und Ultrabase
#
# Verwendung auf eigene Gefahr! Code kopieren und in octopi.url#conf einfügen
# 12 / 12 / 2018 thomas@trueten.de still under developement
#
# https://www.trueten.de/permalink/Einen-Blick-auf-Klipper-riskieren.html
#
#
# This file contains pin mappings for the Anycubic i3 Mega with
# Ultrabase from 2017. (This config may work on an Anycubic i3 Mega v1
# prior to the Ultrabase if you comment out the definition of the
# endstop_pin in the stepper_z1 section.) To use this config, the
# firmware should be compiled for the AVR atmega2560.
# See the example.cfg file for a description of available parameters.

[stepper_x]
step_pin: ar54
dir_pin: ar55
enable_pin: !ar38
step_distance: .0125
endstop_pin: ^!ar3
position_min: -5
position_endstop: -5
position_max: 210
homing_speed: 30.0

[stepper_y]
step_pin: ar60
dir_pin: !ar61
enable_pin: !ar56
step_distance: .0125
endstop_pin: ^!ar42
position_endstop: 0
position_max: 210
homing_speed: 30.0

[stepper_z]
step_pin: ar46
dir_pin: !ar48
enable_pin: !ar62
step_distance: .0025
endstop_pin: ^!ar18
position_endstop: 0.0
position_max: 205
homing_speed: 5.0

[stepper_z1]
step_pin: ar36
dir_pin: !ar34
enable_pin: !ar30
step_distance: .0025
endstop_pin: ^!ar43

[extruder]
step_pin: ar26
dir_pin: !ar28
enable_pin: !ar24
step_distance: .010799
nozzle_diameter: 0.400
filament_diameter: 1.750
heater_pin: ar10
sensor_type: ATC Semitec 104GT-2
sensor_pin: analog13
control: pid
min_temp: 0
max_temp: 260
min_extrude_temp: 170

[heater_fan extruder_fan]
pin: ar44

[heater_bed]
heater_pin: ar8
sensor_type: EPCOS 100K B57560G104F
sensor_pin: analog14
control: pid
pid_Kp: 74.883
pid_Ki: 1.809
pid_Kd: 775.038
min_temp: 0
max_temp: 110

[verify_heater extruder]
heating_gain: 2
check_gain_time: 20
hysteresis: 5
max_error: 120

[fan]
pin: ar9

[mcu]
serial: /dev/ttyUSB0
pin_map: arduino

[printer]
kinematics: cartesian
max_velocity: 300
max_accel: 3000
max_z_velocity: 10
max_z_accel: 60

[heater_fan stepstick_fan]
pin: ar7

# Define the BLTouch servo
[servo bltouch]
pin: ar11
maximum_servo_angle: 180
minimum_pulse_width: 0.0006
maximum_pulse_width: 0.0024

# Define a probe using the BLTouch
[probe]
pin: ar2
x_offset: 26.0
y_offset: 0.0
z_offset: -1.7
activate_gcode:
    SET_SERVO SERVO=bltouch ANGLE=10
    SET_SERVO SERVO=bltouch ANGLE=60
    G4 P200
deactivate_gcode:
    SET_SERVO SERVO=bltouch ANGLE=90
    G4 P100

# Mesh Bed Leveling. One may define a [bed_mesh] config section
# to enable move transformations that offset the z axis based
# on a mesh generated from probed points. Note that bed_mesh
# and bed_tilt are incompatible, both cannot be defined.
[bed_mesh]
speed: 50
#   The speed (in mm/s) of non-probing moves during the
#   calibration. The default is 50.
horizontal_move_z: 5
#   The height (in mm) that the head should be commanded to move to
#   just prior to starting a probe operation. The default is 5.
samples: 1
#   The number of times to probe each point.  The probed z-values
#   will be averaged.  The default is to probe 1 time.
sample_retract_dist: 2.0
#   The distance (in mm) to retract between each sample if
#   sampling more than once.  Default is 2mm.
min_point: 19,32
#min_point: 0,32
#   An X,Y point defining the minimum coordinate to probe on
#   the bed. Note that this refers to the nozzle position,
#   and take care that you do not define a point that will move
#   the probe off of the bed. This parameter must be provided.
max_point: 199,212
#max_point: 175,198
#   An X,Y point defining the maximum coordinate to probe on
#   the bed. Follow the same precautions as listed in min_point.
#   Also note that this does not necessarily define the last point
#   probed, only the maximum coordinate. This parameter must be provided.
probe_count: 5,5
#   A comma separated pair of integer values (X,Y) defining the number
#   of points to probe along each axis. A single value is also valid,
#   in which case that value will be for both axes. Default is 3,3
#   which probes a 3x3 grid.
#fade_start: 1.0
#   The z-axis position in which to start phasing z-adjustment out.
#   Default is 1.0.
#fade_end: 0.0
#   The gcode z position in which phasing out completes.  When set
#   to a value below fade_start, fade is disabled. It should be
#   noted that fade may add unwanted scaling along the z-axis of a
#   print.  If a user wishes to enable fade, a value of 10.0 is
#   recommended. Default is 0.0, which disables fade.
#fade_target:
#   The z position in which fade should converge. When this value is set
#   to a non-zero value it must be within the range of z-values in the mesh.
#   Users that wish to converge to the z homing position should set this to 0.
#   Default is the average z value of the mesh.
#split_delta_z: .025
#   The amount of Z difference (in mm) along a move that will
#   trigger a split. Default is .025.
#move_check_distance: 5.0
#   The distance (in mm) along a move to check for split_delta_z.
#   This is also the minimum length that a move can be split. Default
#   is 5.0.
#mesh_pps: 2,2
#   A comma separated pair of integers (X,Y) defining the number of
#   points per segment to interpolate in the mesh along each axis. A
#   "segment" can be defined as the space between each probed
#   point. The user may enter a single value which will be applied
#   to both axes.  Default is 2,2.
#algorithm: lagrange
#   The interpolation algorthm to use. May be either "langrange"
#   or "bicubic". This option will not affect 3x3 grids, which
#   are forced to use lagrange sampling.  Default is lagrange.
#bicubic_tension: .2
#   When using the bicubic algoritm the tension parameter above
#   may be applied to change the amount of slope interpolated.
#   Larger numbers will increase the amount of slope, which
#   results in more curvature in the mesh. Default is .2.

#*# <---------------------- SAVE_CONFIG ---------------------->
#*# DO NOT EDIT THIS BLOCK OR BELOW. The contents are auto-generated.
#*#
#*# [extruder]
#*# pid_kp = 18.387
#*# pid_ki = 0.936
#*# pid_kd = 90.325
Heutezutage hat gefühlt jedeR einen Youtube Kanal. Ich natürlich auch, jedoch nur zur Prozessüberwachung. ^^ Auf meinem Kanal kann man unserem AnyCubic I3 MEGA 3D Drucker beim Testlauf zusehen, allerdings nur als Livestream. Ein wirklich toller Drucker, den ich allerdings um einiges günstiger direkt beim Hersteller über ebay gekauft habe. Er hat jedoch den Nachteil, daß er laut ist und auch sonst zu Umbauten / Modding anregt ;-) . Wozu ein 3D Drucker? Wenn man sowieso Teile per CAD konstruiert, sind Prototypen eigentlich nur noch der Druckvorgang und so schneller für's Prototyping gefertigt als "on the Fly" auf unseren Werkzeugmaschinen. Bevor jedoch ernsthafte Teile gefertigt werden, druckt der erst mal ein paar Verbesserungen, Tools und Erweiterungen für sich selber aus und absolviert nebenbei diverse Materialtestläufe. Der Drucker wird über einen RaspBerry PI3B+ gesteuert, auf dem der Opensource Server OctoPI / OctoPrint von Gina Häußge läuft. Gefilmt wird momentan mit einer RaspberryPI Cam, wobei die Bildqualität grauslig ist. 8-)
Hier die Liste der Ergänzungen bzw. Umbauten: